Client Onboarding
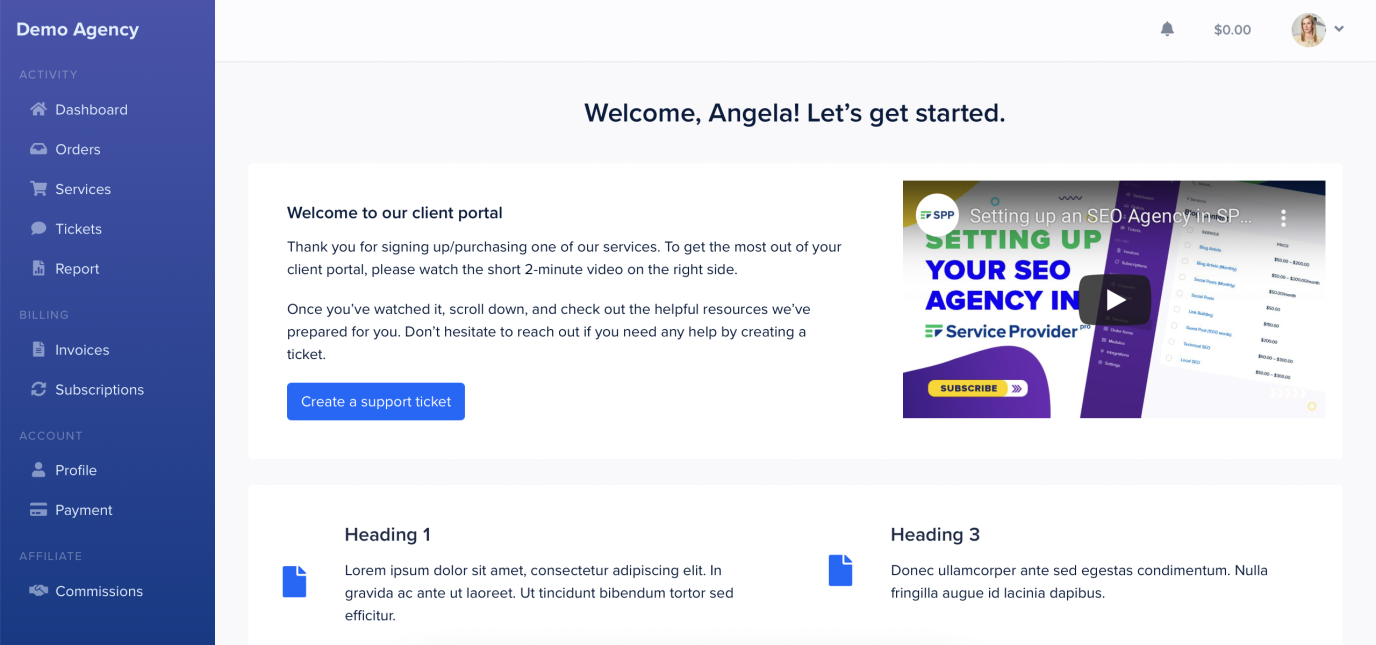
Our onboarding page template gives you a place to show your clients how to use the portal and give them any other information or updates from your company. In combination with our onboarding forms, it makes it easy for you to get new clients to use the portal, and get all the information you need from them.

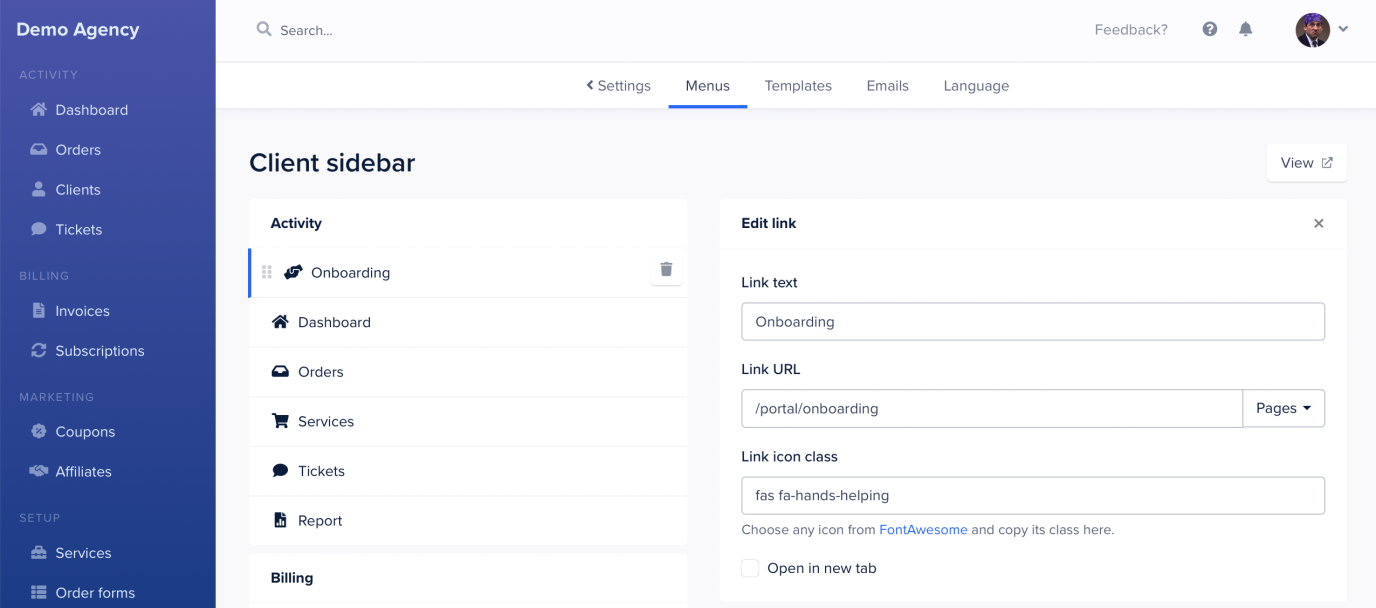
To enable this onboarding template, simply navigate to Settings → Menus → Add Link and set up a sidebar item that directs to /portal/onboarding:

Alternatively you can choose to reset your menu to the default which now will include this page.
Editing Your Onboarding Page
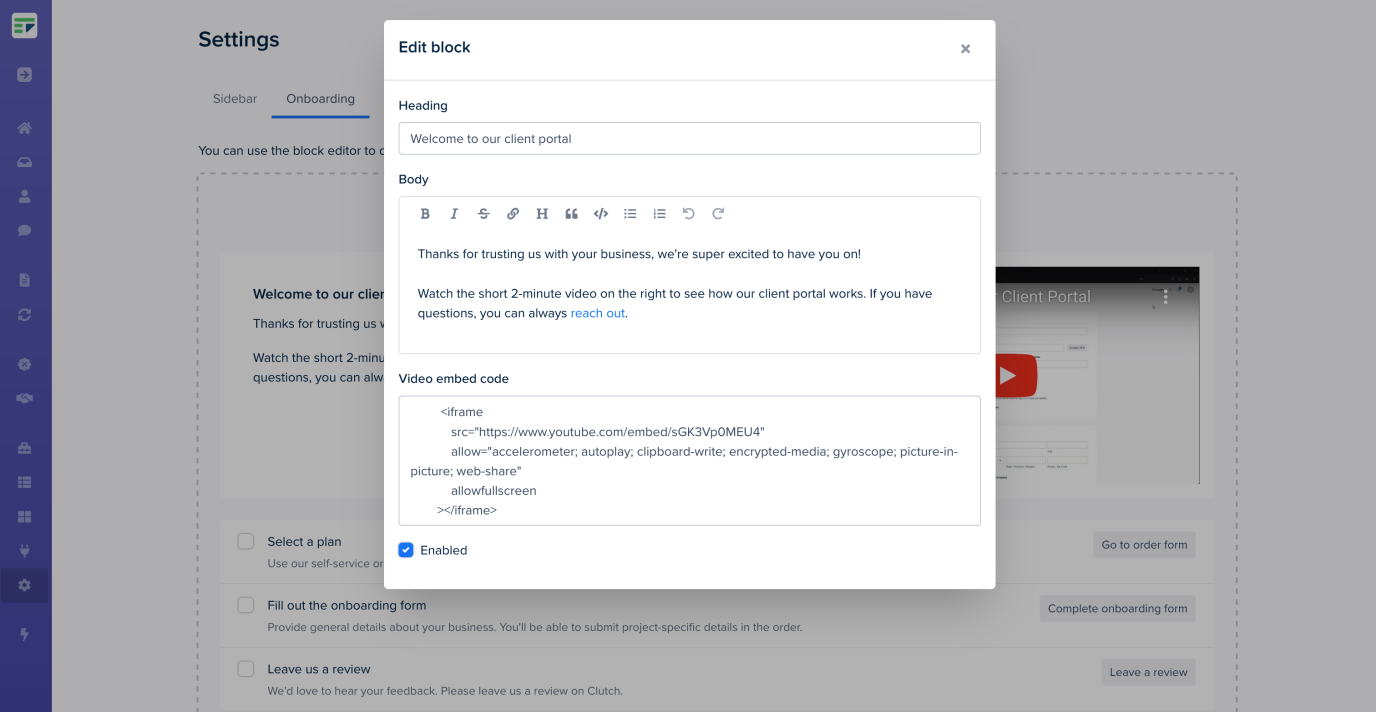
Editing your onboarding page is a very simple task thanks to our onboarding page builder. Head to Settings → Onboarding to access it.
We have a default template that makes it easy to get started without building your onboarding page from scratch. Simply click on any element you would like to edit, make the changes, and save them.

If you’d like to make design changes to the onboarding page, you can do so directly from the template. To edit it, navigate to Settings → Templates → Clients → onboarding.twig.
At the bottom of the page, you can make the onboarding template the default page your clients see after logging in, replacing the dashboard template.
You’re also able to also go to your dashboard template and copy over any elements into the onboarding page.
Note: You can edit the onboarding template on all paid plans.
Adding Onboarding Tasks
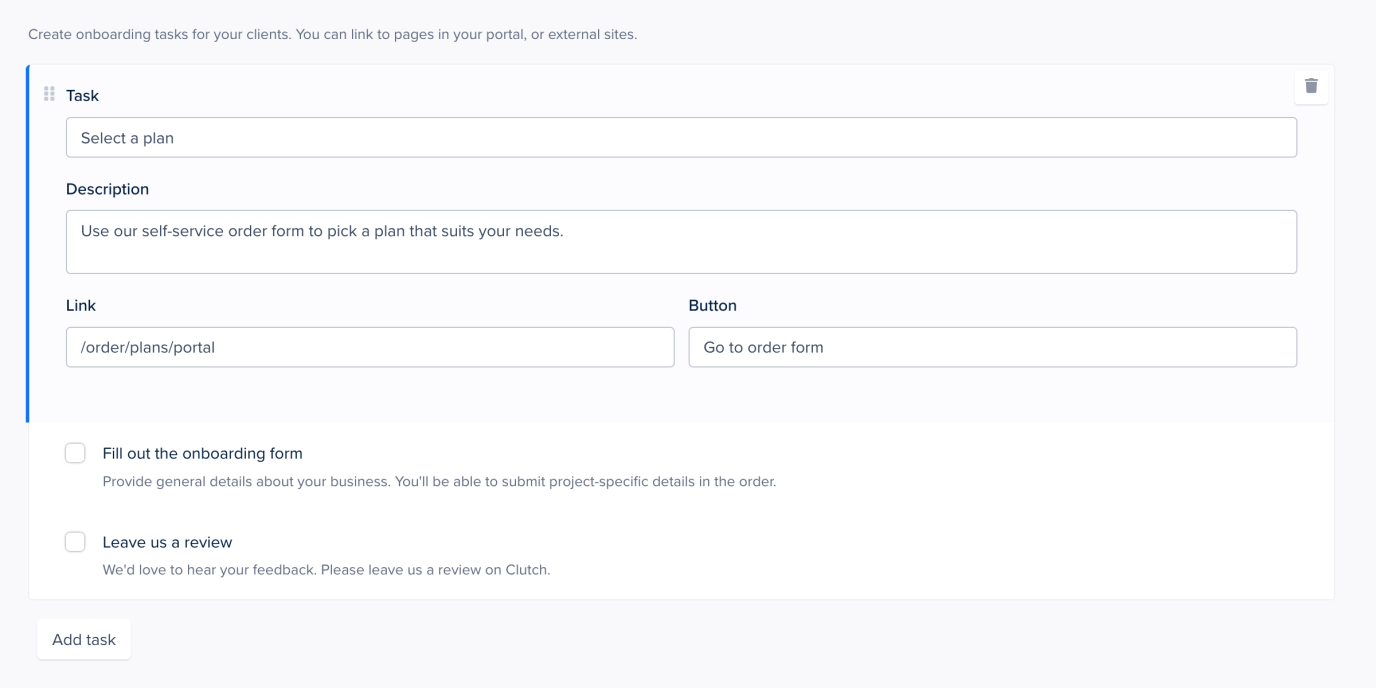
The onboarding page has a built-in tasks feature that you can use to guide your clients through the onboarding process. To add/edit tasks, simply click on the tasks in the onboarding page builder, and confirm that you’d like to continue to the task editor.

Click on any existing task to edit it. You can change the task name, description, link, and button text.
At the bottom of the page, you’re able to add more tasks to your list.